Ostara Soufflé 

Happy Ostara!


 Inspired by the book The Boy Who Ate Around, our Ostara supper was the Giant Cheese Soufflé from Vegetarian Cooking for Everyone with a side of asparagus. It was a big hit, and all of the ingredients are available at Aldi.

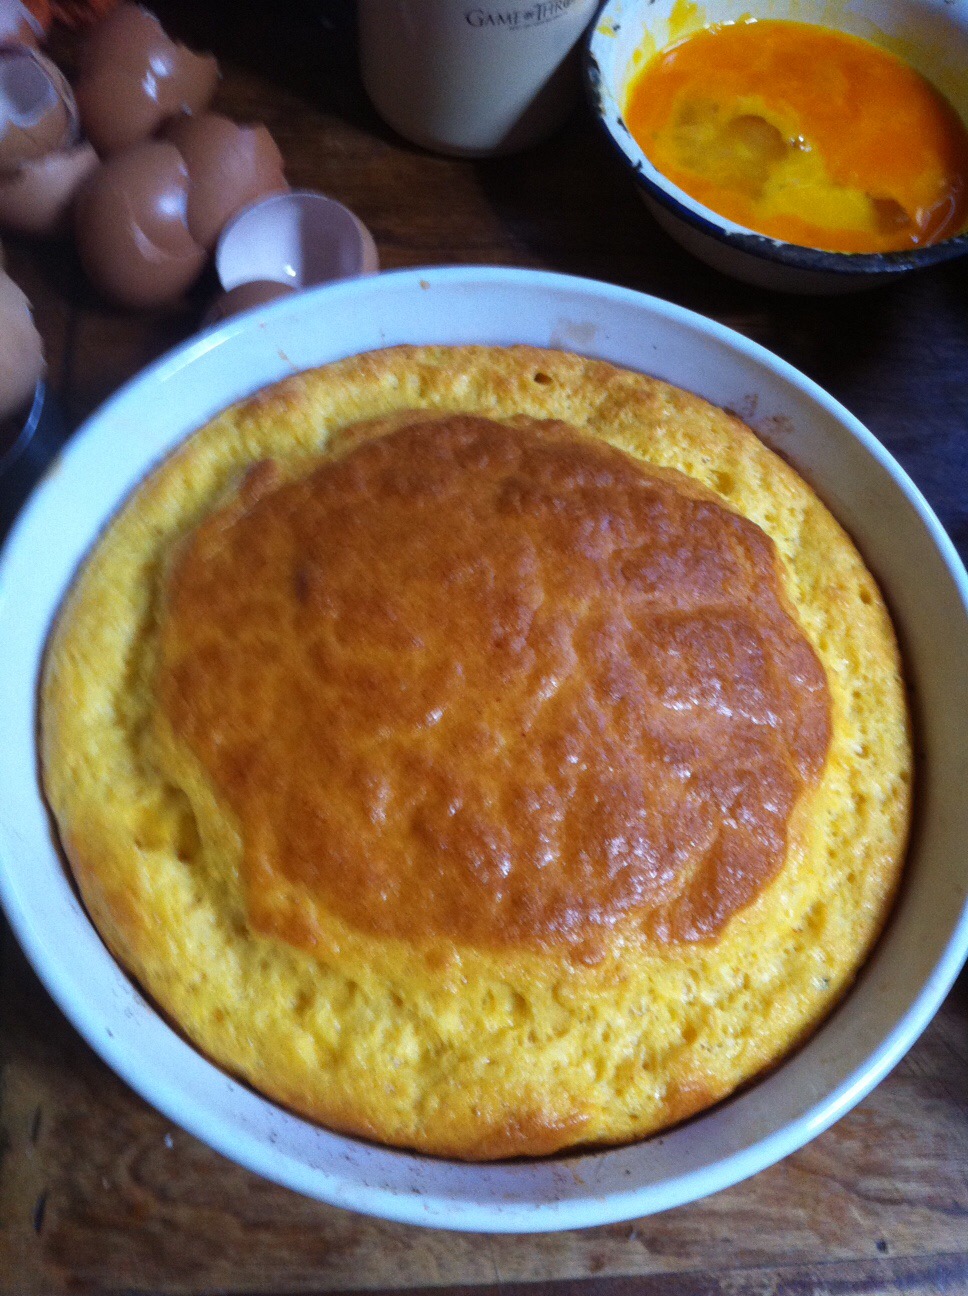
  This grand looking soufflé is baked in a round casserole- 13 – 14 inches across and at least two inches high. I used a dutch oven and a soufflé dish. Serves 6 – 8 (My family ate a double recipe) 
5 + Tbsp Butter

2 Tbsp parmesan

6 Tbsp flour

2 cups warm milk

6 egg yolks

1 3/4 cup grated cheddar

Salt

1 tsp paprika

10 egg whites

Preheat oven to 400 degrees. Butter your large dish and dust the sides with parmesan.
Melt the butter in a saucepan, whisk in the flour, and cook over low heat for several minutes. Whisk in the milk all at once, lower the heat, and cook for one minute, stirring. Remove from heat and beat in the yolks two at a time. Stir in the cheese. Season with 3/4 tsp. salt and the paprika.
Beat the egg whites with a pinch of salt until they hold firm peaks. Fold them into the yolk mixture, then pour into the casserole. Put in the center of the oven and lower the heat to 375. Bake until the soufflé has risen and is golden brown all over the top, about 30 minutes. A slight quivering in the middle and firmness around the edges mean that the center will be loose enough to provide a creamy sauce. If you prefer a firmer center, bake 5 minutes longer. In either case, serve as soon as it’s ready.
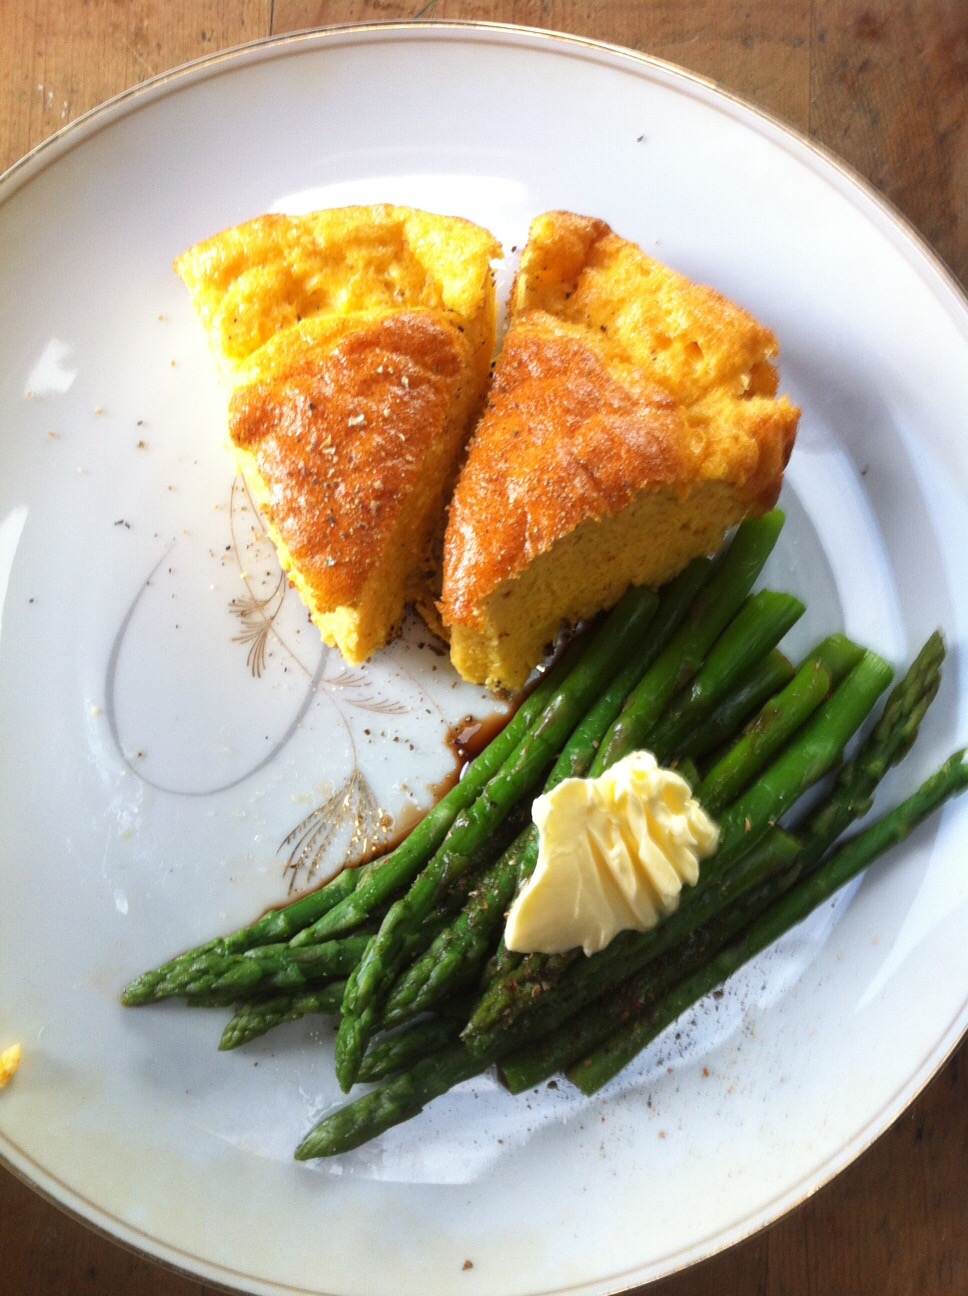

Delicious!

Salt Dough Ostara Tree

  I wanted to make a new Ostara craft this year. I followed my “hard fun” philosophy, and decided to make a salt dough Ostara tree.

I got the idea from The Easter Craft Book by Petra and Thomas Berger

Here is the salt dough recipe:

1 cup water
2 cups salt
3 cups white flour
2 tablespoons liquid starch

Pour the water into a saucepan. Add the salt. Stir continuously as you bring it to a boil. Add all the flour and starch in one go. Stir and knead it all together. Allow the dough to cool.

OK, I probably added more water and starch. And I used starch as a glue as well.

 I made the main body of the tree first. Then added the details. It took about a day and half for me to finish, while also rearing seven children, playing Game of Thrones card game, etc. At night I covered it with a damp cloth – but it was a little mashy in the morning, so maybe plastic wrap would work better.

When it was finished, I baked it in the oven for 8 hours at 200 degrees, checking it frequently.

Problem – I accidentally baked that egg into it. But it was collapsing in the oven otherwise.

 So – how to display it? My brilliant friend suggested I “modge podge” and mount it? I had imagined it to be more temporary, but like this idea. What do you think?

My children also created:

Happy Ostara!

How to Make Ukrainian Eggs

Each egg is a little universe, an Orphic egg, and everything contained within it is arrived at through the use of Sacred Geometry. The practice of making an egg reminds us of who we are, and how our actions relate to the universe around us. Certain rules are followed: what is above, so it is below; always complete a section (or action) before beginning the next. You will have less confusion, and therefore fewer mistakes. Perfect yourself before you try to perfect an egg – the rest will follow. Project every line, and know that your thoughts are projected in the same way. Do not keep your eyes on the kistka as you draw a line. When you set the kistka down, look forward and push the tool to that spot. The results will always be better. Likewise, we should always look forward in our lives, trying to determine the outcome of our actions. ”   –Deirdre LeBlanc


  I always enjoyed dying Easter eggs with my German grandmother. It was a yearly tradition. When I was 18 I enrolled in a Pysanky class at the local community college. Interestingly, that was the same year I took a basket weaving and bellydancing class. As if I knew what life had in store for me.
  To make Pysanky, or Ukrainian eggs as they are sometimes called, you need some basic tools and household supplies. Every March I set up a work table.

Supplies:
kistkas (kistka means “little bone” because they were originally made out of bones – over three thousand years ago!)

dyes


beeswax
candles
rags
matches
eggs
inspiration


I initially bought a basic kit.

  
Mix your dyes: Follow the directions for making your dye baths, written on the powdered dye packages. Mine needed 1 1/4 cup water and some vinegar added. I used dye ordered from Magic Cabin Dolls; you can also use RIT in a pinch, but it totally pales in comparison.
Apply wax: Start with an egg, and let it get to room temperature. If it is too cold, the wax won’t stick. You then light your candle and warm your kistka in its flame. Then scoop a bit of wax and hold it near the candle until the wax is melted. Begin to draw your design. You can draw something as simple as a spiral, or your name. Or you can make something complex and colorful. Covering everything you want white in wax. My wax draws on black because, I think, I use an old kistka and the wax has been scorched like a campfire roasted marshmallow. Your wax might go on clear or yellow.

Dye Bath: Put the waxed egg into the next color needed, most often yellow. After a while (15 minutes to overnight), remove the egg from its dye bath and repeat the wax process, color by color.
Green isn’t applied as a bath, rather it is applied only to the areas desired with a Q-tip. Green is the only color this is done with. My green sucked this year, as I used old RIT dye instead of pysanky dye.

Now more wax. Then orange.

Red.

Then blue, purple, black.

By now your egg is a black waxy mess.

Remove wax: Take your waxed and dyed egg and hold it near the flame. Do not put it directly in the flame because it will get scorched and ruined! As the wax melts, carefully use a rag or tissue to wipe of the melted wax, revealing its colorful brilliance! And be careful! Flames are dangerous! AND this is the point at which many eggs break. I pay my children one dollar if I break an egg they’ve been working on.


You can also melt the wax off in an oven. (Instructions below)  But you’ll need to blow it out first if you want to hang it.


 Blowing out your egg: This is another risky egg breaking endeavor. We rarely blow our eggs, rather choosing the traditional method of leaving them intact. Give them away as gifts as soon as possible. You’ll feel good about it, and won’t be responsible for their destruction.


But if you blow them out, you can thread them and hang them on your Ostara branch. Here’s my method. Be careful!

Use a straight pin and carefully poke a hole in the top of the egg. Then turn the egg over and poke a few tiny hole in the bottom of the egg, essentially scoring out a small circle. Turn the egg back to small side up and blow, gently but firmly, the egg contents into  bowl. The technique takes some practice, so you might want to try this on a few less dear eggs.


Imagine me above the egg making a face like a trumpet player.


Then you can string your eggs. This year I used a doll making needle and some Malabrigo wool, but ribbon is lovely, and bead work would be beautiful!

You can also melt the wax off in an oven. I have been making pysanky for over 20 years, and have never before tried this method. Use a regular oven @ 250 deg F. I balanced the eggs on beer caps on an old pizza sheet. It worked great, but you need to blow out your eggs BEFORE you bake them. Also, I found some of the magic of slowly revealing your design was lost.

Watch for the wax to soften, then remove carefully and wipe off with a soft cloth or paper towel.

Varnish: Whether or not you’ve blown your egg, the final step is to apply varnish. It makes the eggs very shiny and fancy! Spray several thin layers of an oil based varnish.

Christopher got home from Paganicon late last night, and look what he brought me. A shiny new kistka and natural dyed eggs from Steven Posch!


Here are some websites you might enjoy for further study:


And more photos of our pysanky week:

How are you celebrating Spring?

spring omnipotent goddess Thou -e. e. cummings

spring omnipotent goddess Thou

dost stuff parks

with overgrown pimply

chevaliers and gumchewing giggly

damosels Thou dost

persuade to serenade

his lady the musical tom-cat

Thou dost inveigle

into crossing sidewalks the

unwary june-bug and the frivolous

angleworm

Thou dost hang canary birds in parlour windows

Spring slattern of seasons

you have soggy legs

and a muddy petticoat

drowsy

is your hair your

eyes are sticky with

dream and you have a sloppy body from

being brought to bed of crocuses

when you sing in your whisky voice

the grass rises on the head of the earth

and all the trees are put on edge

spring

of the excellent jostle of

thy hips

and the superior

slobber of your breasts i

am so very fond that my

soul inside of me hollers

for thou comest

and your hands are the snow and thy

fingers are the rain

and your

feet O your feet

freakish

feet feet incorrigible

ragging the world

Vegan Mediterranean Wheat Berry Salad

Do you have a bucket of soaked wheat berries on your counter, left over from your equinox activities? I do!

 I adapted this Mediterranean salad from Madhur Jaffrey’s World Vegetarian “Salad of Whole Wheatberries”. It is a beautiful cookbook. I do not use it often, but I use it when I want something special. And it has my all time favorite recipe for Mulligatawny soup.

(While I’m on the topic of Madhur Jaffrey, her book Seasons of Splendour is beautiful and I use it for teaching the 5th grade Waldorf homeschool curriculum.)

Mediterranean Wheat Berry Salad

3 Tbsp. olive oil
1 onion, finely chopped
2 garlic cloves, peeled and finely chopped
3 cups chopped tomato
1 sweet pepper, chopped ( I used a yellow one from Aldi)
3 cups whole wheat berries, boiled and drained
3/4 cup finely chopped parsley
1 tsp. thyme
1/2 tsp. rosemary
1 tsp. salt
black pepper
3 Tbsp. lemon juice

Put the oil in a non stick skillet and set over medium heat. When hot put in the onion and garlic.Stir and fry for 2 to 3 minutes, or until the onion has browned a little. Now put in the tomato and sweet pepper. Stir and fry another 3 minutes. Add the drained wheat berries and stir. Add the spices, adjusting to taste. Stir again and remove from heat. Add the lemon juice and stir.

This salad can be served hot, cold or room temperature. It can be used to stuff peppers, squash or tomatoes then baked.

I want to add some thing green to this. So I tossed in some greens from the fridge. But if I could choose…. Arugula? Zucchini? Cilantro? What would you add?

Look what I found in the yard yesterday…

Happy Ostara everyone!

Homemade Paper Bag Ostara Baskets

  15 years ago, my children, grandmother and I made a basket from paper bags.  I still have this basket; it has survived floods, toddlers, and blizzards.  I was going through our house, looking for baskets for our upcoming Waldorf home school day.  I realized that this paper bag basket would be a great basket to grow wheat grass in.  It would also be an appropriate Brigid activity because of the weaving.

This is my first tutorial, so follow along carefully, but use your own intellect and experience as we go.

Here’s how they are made:
You will need

nine paper grocery bags ( I use Aldi bags, of course!)

a yard stick or ruler
a pair of scissors
a sturdy stapler
glue 

Cut twelve pieces of paper bag paper 20″x16″

and cut another six pieces 28″x16″

That’s 18 all together!

Fold them as if you are folding double fold bias tape:

Fold them to the middle, then unfold.

Then fold the edges to the middle

then again fold to the middle

then again in half. They will measure approximately 1 ” wide

Rub them over a counter to make really sharp folds.

Choose one of the longer strips to be the top edge.

Evenly space 12 of the 20″ strips from the top edge and staple them in place.

(This also looks like a hula skirt!)

 
Fold 6 of those strips to the opposite side and staple them.

Then begin weaving in the remaining 6 strips, as if you are making a lattice pie crust, and staple them to the opposite side.

Now weave four of the last strips around the width of the basket from the bottom up. Overlap their edges and staple them to themselves. if possible, hide the staples under the horizontal strips.

Your basket should now appear mostly done.

 Use the last strip to cover the top heavily stapled strip and glue it in place.

If you would like a handle, you could punch a hole and sew or use a  manilla envelope fastener. You could also make a handle by making one of the strips as long as possible and weaving it all the way through.

My basket looked especially good today, since it was holding all the finished wedding invitations!

Wednesdays Waldorf- Inspired Homeschool day is looking very fun.